Установка спутниковой антенны для приема каналов со спутников состоит из нескольких этапов:
- Выбор списка каналов
- Выбор телевещательных спутников и определение диаметра спутниковых антенн
- Выбор оборудования для установки антенн на 4 спутника
- Выбор места для установки спутниковых антенн
- Сборка спутниковой антенны
- Установка кронштейнов на стену
- Настройка спутниковых антенн и конвертеров на спутники
- Подключение diseqc-переключателя к антеннам и ресиверу
- Прокладка и подключение телевизионного кабеля
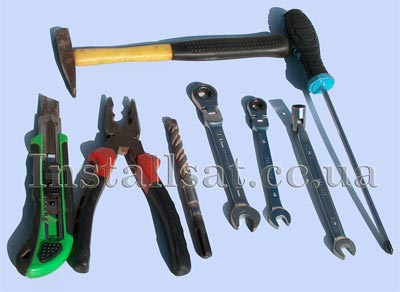
Для установки антенны и её настройки понадобятся некоторые довольно доступные инструменты, крепежные соединения, руки и голова :)
Выбор списка каналов
В первую очередь, нужно определиться с тем, какие каналы вы хотели бы смотреть на вашем телевизоре. Списки каналов на русском и украинском языках, вы можете просмотреть на нашем сайте на странице «Списки каналов без абонентской платы». На этой странице перечислены только каналы, которые вещают в открытом доступе, или открываются с помощью Biss-ключей, которые поддерживаются любым современным ресивером. Если вас не устраивают представленные списки каналов без абонентской платы, вы можете ознакомиться со списками платных каналов украинских провайдеров XTRA TV или Viasat, где прописаны условия их просмотра.
Выбор телевещательных спутников и определение диаметра спутниковых антенн
По выбранному вами списку каналов можно определиться с выбором спутников, с которых эти каналы ведут трансляцию. Кликнув по названию спутника на страницах каналов, вы увидите соответствующую карту покрытия интересующего вас спутника. Найдя свой регион на картах, вы можете выбрать диаметр антенны для уверенного приема каналов с определенного спутника. Для центральной точки на карте, вам хватит антенны диаметром 0.6м, для следующих зон уже нужны антенны диаметром 0.9м, 1.2м и т.д.
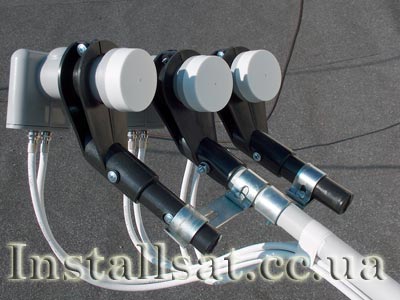
Использование специальных боковых держателей (мультифиды) позволяет крепить на антенну сразу не один, а несколько LNB-головок, и соответственно, установить антенну для приема каналов сразу с нескольких спутников. Мультифид крепится к несущей планке антенны, и позволяет легко регулировать положение боковых конвертеров для достижения максимального сигнала.
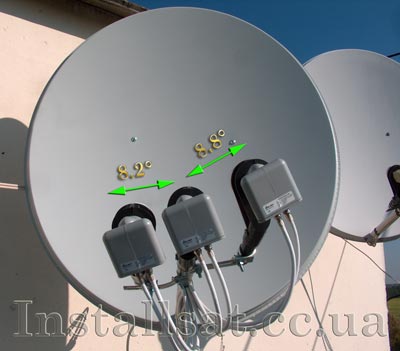
Однако, следует иметь в виду, что разбег между этими спутниками относительно центрального не должен быть больше 15 градусов в зонах уверенного приема этих спутников. Также стоит учитывать, что чем дальше расположен дополнительный конвертер от центрального держателя, тем слабее сигнал он будет выдавать.
Чем больше вы выберете диаметр антенны, тем больше сигнала поступит на конвертер и, соответственно, более стабильным будет прием со спутников в плохую погоду. Так как вода – плохой проводник радиоволн, то при плотных облаках в направлении спутника, при сильном дожде или снегопаде вы заметите падение сигнала в виде рассыпающегося изображения на вашем телевизоре, или надпись «нет сигнала». На высокую стабильность сигнала влияет и точность настройки антенны на спутник. Если вы никак не можете сами настроить антенну, не расстраивайтесь, вы всегда можете вызвать профессионального установщика, который грамотно настроит антенны с помощью специальных приборов. Конечно, в этом случае, вам все-таки придется расстаться с некоторыми деньгами, но теперь вы можете быть уверены, что антенна настроена максимально точно.
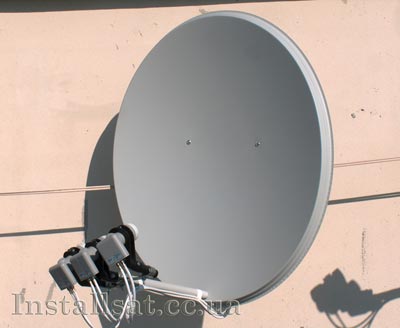
Самый популярный и экономичный тип установки сегодня – это установка двух антенн на 4 спутника: Astra, HotBird, Amos на одну антенну,
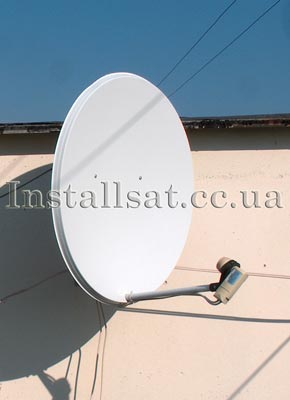
и любой дополнительный спутник по вашему выбору на вторую антенну.
Выбор оборудования для установки антенн на 4 спутника
Для установки антенны на 4 спутника вам понадобится diseqc-переключатель на 4 порта, 2 антенны, 4 конвертера (головки), 2 боковых крепления конвертеров, 2 кронштейна, 10 разъемов (F-гаек) для кабеля, и необходимое количество кабеля для прокладки от diseqc-переключателя до вашего телевизора и от каждого конвертера до diseqc-переключателя. Подробнее об оборудовании, необходимом для разных вариантов установки, вы можете узнать по ссылкам ниже:
Спутниковая антенна
Для уверенного приема, во многих случаях, достаточно антенн диаметром 0.9м. Самый оптимальный выбор (цена-качество) в Украине сегодня – это антенны Харьковского завода «Вариант».
Diseqc-переключатель
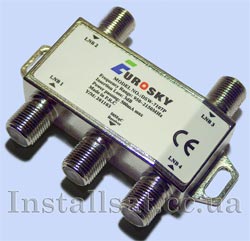
Diseqc-переключатели бывают открытые,
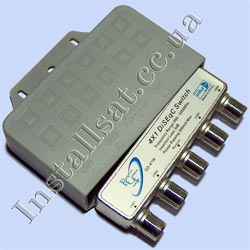
и в защитном кожухе. Кожух помогает защитить переключатель от воздействия атмосферных явлений. При выборе производителя рекомендуем посоветоваться с продавцом.
Конвертеры (LNB-головка)
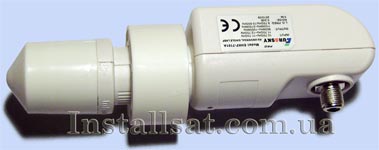
Для установки первой антенны вам понадобится 3 универсальных конвертера с линейной поляризацией.
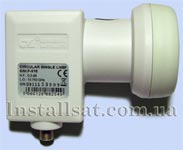
Для второй антенны, в большинстве случаев, устанавливают такой же конвертер, исключение – спутник Eutelsat W4 36E (NTV+) – в этом случае требуется конвертер с круговой поляризацией.
Кронштейн (крепление на стену)
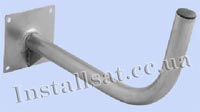
Кронштейны следует выбирать по их длине, чтобы стена, к которой крепится антенна, не мешала антенне вращаться в нужном направлении.
Кабель
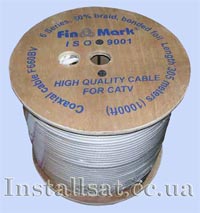
При установке антенны, особое внимание следует уделить кабелю, так как он должен лежать или висеть на улице всю свою «жизнь». Рекомендуем телевизионный кабель FinMark F-660BV. Кабель плохого качества может иметь неожиданно короткую «жизнь». Не стоит экономить на кабеле, так как плохое качество кабеля может в лучшем случае повредить diseqc-переключатель, а в худшем – конвертеры и ресивер. При прокладке кабель не должен перегибаться или иметь резкие изгибы. В настоящее время существует множество специальных креплений для кабеля для разных поверхностей, что значительно упрощает и делает установку более практичной. Все соединения кабеля должны быть легко доступны. Хороший продавец всегда подскажет вам подходящий кабель.
Спутниковый ресивер
Выбор цифрового спутникового ресивера следует делать максимально ответственно. От него зависит ваша удовлетворенность просмотром любимых каналов. В настоящее время огромный выбор производителей и моделей ресиверов, но все-таки можно дать несколько рекомендаций.
В первую очередь, ресивер должен поддерживать формат вещания выбранных вами каналов. Ресиверы стандарта DVB-S SD могут принимать только каналы в формате mpeg-2. Ресиверы стандарта DVB-S2 HD принимают каналы в форматах mpeg-2, mpeg-4, HD и 3D.
Стоит определиться, будет ли вам нужно подключение к интернет для обновления программного обеспечения ресивера, просмотра онлайн-сервисов (например, u-tube) или для получения ключей к некоторым каналам. Для этих целей у некоторых ресиверов есть LAN-вход.
Обратите внимание на наличие необходимых выходов для подключения к вашему телевизору. Если у вас плоский телевизор, для получения более качественной картинки и звука, стоит подключить его к ресиверу цифровым кабелем HDMI, естественно, у ресивера тоже должен быть такой разъем.
Если вы хорошо разбираетесь в компьютерах, рекомендуем приобрести ресивер с открытой операционной системой Linux. Это позволит вам подключиться к ресиверу с вашего компьютера, устанавливать в тюнер различные плагины, что значительно расширяет его функциональность. Наличие USB-порта позволит вам записывать и воспроизводить любимые передачи, а также записывать программы с помощью таймера.
Очень полезная Time-shift (таймшифт) функция в некоторых ресиверах, позволяющая вам поставить на паузу текущую трансляцию и возобновить просмотр позже, не пропустив ни одного важного момента.
У некоторых ресиверов есть возможность подключения к беспроводной интернет-сети через USB-порт с помощью WI-FI-адаптера (в некоторых моделях WI-FI уже встроен).
Многие ресиверы, помимо записи, достойные мультимедийные центры, позволяющие смотреть видео в различных форматах (avi, mpeg4, mkv…). Наличие цифрового аудиовыхода spdif позволит вам подключить тюнер к вашей аудиосистеме, что позволит наслаждаться не только высококачественным изображением, но и чистым цифровым звуком.
Не спешите покупать новые, только что вышедшие модели ресиверов. Прочитайте положительные и отрицательные отзывы о понравившемся вам тюнере на форумах. Узнайте, как часто обновляется программное обеспечение и прошивка для этого ресивера. Постарайтесь узнать, как давно существует производитель ресивера и как долго он планирует выпускать и поддерживать эту модель.
Выбор места для установки антенн
Следующим этапом нужно определить место установки антенн. Желательно устанавливать антенны в легкодоступном для вас месте. Это позволит вам точно их настроить, а в будущем, будет легко производить их обслуживание в случае непредвиденных обстоятельств (замена конвертеров, diseqc-переключателей и т.д.). Также, со временем, вы можете захотеть подключить к антеннам дополнительные телевизоры – для этого вам нужно будет заменить одиночные конвертеры (сингл) на двойные (твин), 4-выходные (квадро), или 8-выходные (окто) конвертеры, а также добавить нужное количество diseqc-переключателей и проложить дополнительные кабели от антенн до телевизоров. Если у вас нет возможности установить антенны в легкодоступном месте (например, на крыше многоэтажного дома, или на нижних этажах с лестницами), то антенны можно установить на стене дома, возле окна, если окна «смотрят» в сторону выбранных спутников. В этом случае, боковые конвертеры антенны нужно предварительно настроить относительно центрального конвертера в легкодоступном месте. При установке из окна, вам нужно будет настроить только антенну на центральный спутник, боковые конвертеры уже будут настроены. Так как сейчас установлено достаточно антенн, то самый простой способ узнать, в какую сторону следует направить ваши антенны – это посмотреть, в какую сторону они направлены на соседних домах. Если такой возможности нет, не беспокойтесь, есть замечательный сервис направление спутниковой антенны по карте. Вам нужно будет только ввести страну, город, улицу, номер дома и выбрать интересующий вас спутник. В случае антенны на Astra 4A (Sirius), HotBird, Amos, антенна будет изначально настроена центральным конвертером на спутник Astra (также известен, как Sirius). Вы увидите ваш дом на карте и направление установки антенны на выбранный спутник. Если у вас нет доступа в интернет, попробуйте определить направление юга любым другим известным способом (например, в Украине, солнце светит с южного направления примерно в 2 часа дня, или найдите какой-нибудь компас). Если вы собираетесь устанавливать больше одной антенны, следует учесть, что они должны располагаться как можно ближе друг к другу, так как дополнительные антенны нужно будет подключить кабелем к diseqc-переключателю на основной антенне. Вам также следует учесть, что деревья и строения, расположенные в направлении спутника, могут стать препятствием, и вы не сможете «поймать» сигнал сквозь них.
Сборка спутниковой антенны
После определения места, самое время приступать к сборке антенн. Если антенны будут устанавливаться на крыше многоэтажного дома, стоит задуматься, где собрать антенну – в квартире или на крыше, так как собранная антенна может быть больше, чем выход на крышу. Если антенна в собранном виде не «пролазит» в выход на крышу, а собирать её на крыше крайне проблематично, то собранную антенну можно поднять на крышу с помощью верёвки снаружи.
На следующей странице вы найдете описание и подробные инструкции по сборке спутниковой антенны Харьковского завода «Вариант».
Крайне важно понимать, что все высотные работы очень опасны и необходимо соблюдать все возможные меры предосторожности и, конечно же, быть хорошо застрахованным.
Какие инструменты нужны для сборки и установки антенн:
- Ключ на 13мм
- 2 ключа на 10мм
- Крестовая отвертка
- Плоскогубцы с кусачками
- Острый нож
- Перфоратор с буром
Установка кронштейнов на стену
Далее нужно закрепить кронштейны для крепления антенн на стену.

В большинстве случаев, кронштейн крепится с помощью пластиковых дюбелей 12x80(мм) или металлических дюбелей-анкеров.
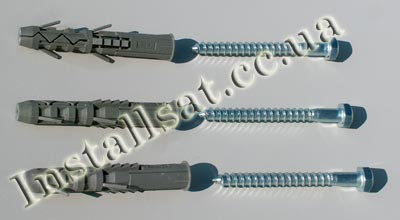
В зависимости от выбранного вами крепления, не забудьте прихватить с собой соответствующий ключ.
Прикладываем кронштейн к стене с расчётом, чтобы ничто не мешало будущей антенне. В свою очередь, ваша антенна не должна стать препятствием для сигнала уже установленных соседских антенн.
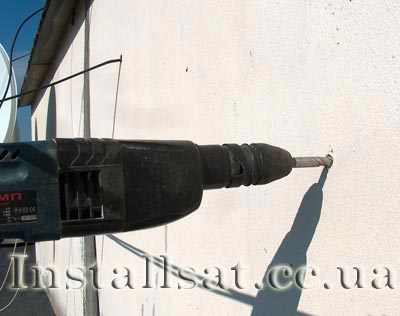
Постарайтесь выбрать прочную и надёжную поверхность стены. Расстояние от угла стены до болтов должно быть достаточным, чтобы угол не треснул при затягивании болтов. Отмечаем карандашом отверстия под кронштейн. В зависимости от выбранного крепления, сверлим в стене отверстия нужного диаметра, на глубину немного больше длины дюбеля или анкерного болта.
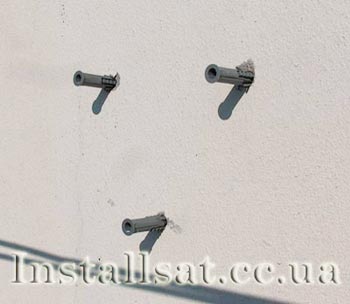
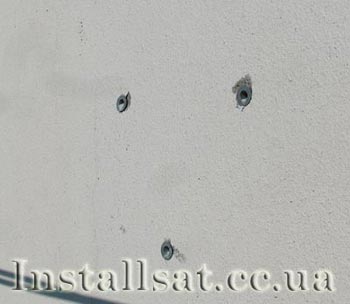
Вставляем дюбели в получившиеся отверстия и забиваем их молотком.
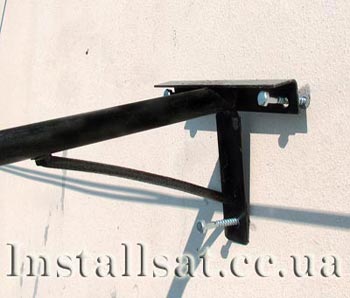
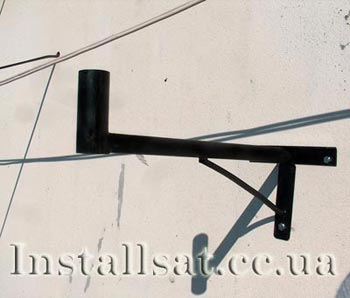
Прикручиваем кронштейн к стене. Проверяем надежность крепления кронштейнов, приложив к ним некоторую силу, нужно учесть, что антенны имеют хороший парус и на кронштейны постоянно действует вибрация. Конечно, после сильного ветра антенна должна остаться на своем месте.
Настройка антенн и конвертеров на спутники
В первую очередь, рекомендуем вам ознакомиться со статьей «Как правильно одеть F-коннектор на кабель». На первый взгляд, это довольно простая операция, но без соблюдения некоторых правил, можно серьезно повредить подключенное оборудование.
На данном этапе, вы можете повесить антенны на кронштейны. Если вы планируете установку антенны на крышу, то вам понадобится небольшой телевизор и настроенный ресивер (например, возьмем самые распространенные «Globo», «Orton» или их аналоги, модели 4100s (или 4050s)).
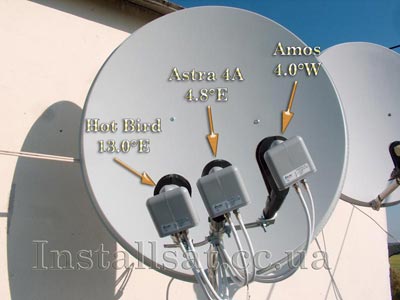
Рассмотрим настройку антенны на 3 спутника (Amos, Sirius, HotBird). Сначала нужно настроить антенну на спутник Sirius (Astra). Для этого подключите один конец кабеля к центральному конвертеру, а другой конец к входу ресивера (LNB in).
Все манипуляции с разъемами производите при выключенном ресивере.
Ресивер должен быть подключен к телевизору, нажмите кнопку «OK» на пульте управления ресивером, перейдите к спутнику Sirius, выберите рабочий канал, например, «Рада» или «2+2», нажмите кнопку «OK» ещё раз, чтобы переключиться на выбранный канал.
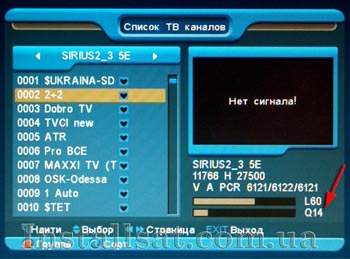
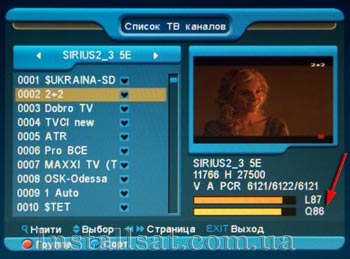
В правом нижнем углу под окном просмотра появится информация о канале и две шкалы: первая показывает уровень сигнала, а вторая - его качество. Антенны настраиваются по нижней шкале «качество». Медленно вращайте антенну в горизонтальном и вертикальном положениях до появления сигнала на шкале. Теперь двигайте антенну буквально на миллиметры, пытаясь добиться более сильного сигнала. Далее, подтягивая гайки, нужно добиться максимально возможного сигнала. Поворачивая конвертер вокруг своей оси, можно дополнительно увеличить сигнал (подробнее о поляризации написано на странице «Настройка спутниковой антенны с помощью Google maps»). Не пытайтесь поймать 100% сигнал, это нереально. Нажмите кнопку «Выход» и проверьте сигнал на других каналах этого спутника. Каналы с одного спутника могут иметь разное качество сигнала - это нормально. Чтобы настроиться на спутник Amos, выключите ресивер, открутите кабель от среднего конвертера, подключите его к конвертеру справа (также к верхнему),
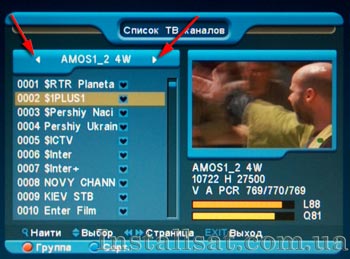
и включите ресивер по предыдущему примеру на рабочем канале спутника Amos, например, «1+1» или «Новый Канал». Используя регулировочные болты мультифида, и поворачивая конвертер вокруг своей оси, добиваемся максимального сигнала с этого спутника.
Аналогично подключаемся к левому, нижнему конвертеру, и настраиваем спутник HotBird.
Подключение дисека к антеннам и ресиверу
Подключите кабели от конвертеров к дисеку. Запишите, какой порт дисека (порты пронумерованы) соответствует каждому спутнику. Например, вы подключили конвертер, который принимает сигнал со спутника HodBird, к первому порту, Sirius - ко второму, Amos - к третьему. Далее, один конец кабеля от дисека подключаем к порту «Reseiver», а другой - к гнезду «LNB IN» тюнера и включаем ресивер. В ресивере заходим в меню, настройки антенны (установка), в верхнем ряду в выпадающем списке выбираем спутник, например, Amos, а в строке «diseqc» выбираем соответствующий порт (в этом примере 3/4, где 3 - номер порта дисека, 4 означает, что наш дисек имеет всего 4 порта).
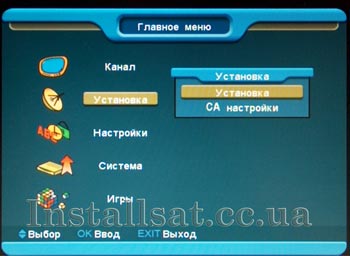
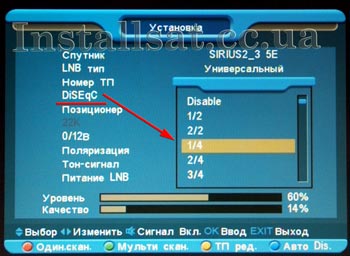
В некоторых ресиверах нумерация дисека не цифровая, а буквенная на английском, например, LNB «A», LNB «B», LNB «C» и т.д. Таким же образом мы «привязываем» остальные спутники. Выходим из меню кнопкой «EXIT» на пульте управления, соглашаемся сохранить настройки. При правильном подключении каналы со всех настроенных спутников должны показываться. Вторая антенна настраивается так же, как и первая, и подключается к оставшемуся порту дисека.
Следует напомнить, что все соединения производятся при отключенном ресивере от источника питания.
Прокладка и подключение телевизионного кабеля
Как мы уже говорили, кабель не должен иметь перегибов и изгибов под острыми углами на всей своей протяженности. Если вы заводите кабель в помещение с улицы, то отверстие для кабеля нужно сверлить под углом, чтобы вода с улицы не протекала в отверстие внутрь.
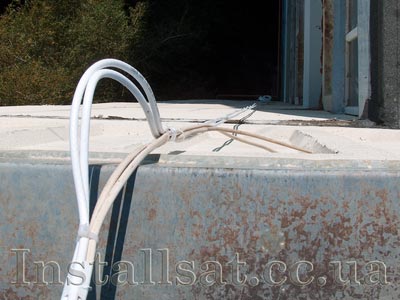
Если кабель спускается с крыши, закрепите его так, чтобы, свисая с угла крыши, он не терся ни о что под воздействием ветра, снега и т.д.
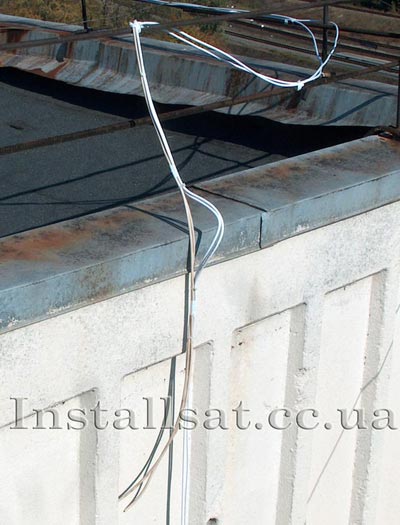
Снаружи кабель подключается к дисеку к порту «reseiver», внутри - к входу ресивера «lnb in».
В итоге, если все правильно подключено, и кабель не поврежден, то вы наконец-то сможете наслаждаться качественным изображением, большим количеством каналов и отличным звуком.
Удачи! Вперед, вы справитесь.

